+86-13901441113


Choosing an Outdoor Play Structure is more than picking bright colors or the tallest slide. It is a practical decision about safety, movement, space, and daily family use. A sturdy structure can encourage climbing, balancing, swinging, and imaginative play. However, attractive equipment may still be unsuitable for your yard or your child’s age.
These ten tips examine the details that often get overlooked. They cover materials, weight limits, fall zones, anchoring, surface protection, accessibility, maintenance, and age-appropriate design. Check the manufacturer’s instructions carefully, and compare them with recognized playground safety guidance. Look closely at bolts, handrails, platform heights, and possible pinch points. Measure the available area before ordering. A level surface and generous clearance can matter more than extra accessories.
Details matter. Children notice comfort, too. A hot metal slide, rough timber, or awkward ladder may quickly reduce interest. Consider how the structure will feel after rain, strong sunlight, and months of regular use. Experience helps, but it does not replace inspection. Even a well-reviewed product can develop loose hardware or worn surfaces. That is an easy thing to underestimate. We should also admit that no structure removes every risk; supervision and sensible play boundaries remain necessary. With careful research and honest reflection, families can choose equipment that supports active play without treating safety as an afterthought.
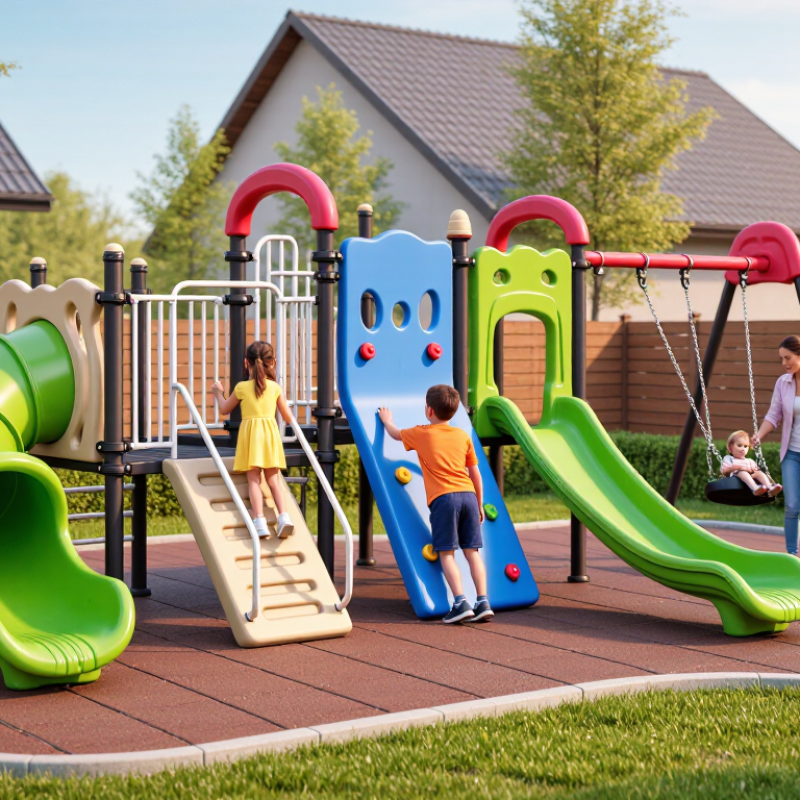
Choosing an outdoor play structure starts with the children who will use it. Age, body size, confidence, and developmental ability matter more than appearance. CPSC guidance commonly separates users into stages such as 6–23 months, 2–5 years, and 5–12 years. Each stage needs suitable heights, grips, steps, and challenge levels.
Watch children in the actual play area. A cautious four-year-old may need lower platforms and wide steps. A confident eight-year-old may need climbing features, balance elements, and more movement space. Count likely users during busy periods, not quiet mornings. Check the structure’s intended capacity and allow room for children to pass without collisions. Crowding creates risks near slides, swings, and climbing exits.
Separate age groups when possible. Toddlers should not share fast-moving equipment with older children. Use clear boundaries, protective surfacing, and enough fall-zone space around elevated parts. CPSC recommendations offer a reliable starting point, but they do not replace local inspection requirements or careful supervision. A structure can meet basic guidance and still feel wrong for a particular group. That is worth questioning. Sometimes, fewer features create safer, more meaningful play. Reassess the layout after observing real behavior, because children rarely use equipment exactly as adults imagine.
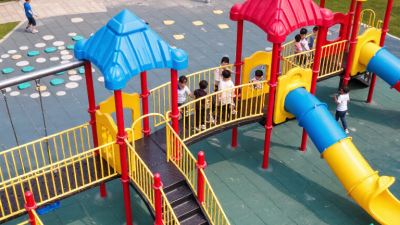
Define user needs by age, capacity, and CPSC developmental guidance.
The U.S. Consumer Product Safety Commission groups public playground equipment into three primary age categories: 6–23 months, 2–5 years, and 5–12 years. Use the appropriate age band as a starting point, then confirm the structure’s user capacity, supervision requirements, accessibility features, fall zones, and manufacturer specifications.
A low purchase price can hide expensive maintenance. Compare the full ten-year cost, not only the invoice. Include delivery, installation, safety surfacing, inspections, repairs, replacement parts, and removal. A simple spreadsheet makes differences visible. Keep receipts and inspection notes.
Galvanized steel often handles heavy use well, but scratched coatings may invite corrosion.
Aluminum resists rust and weighs less, though some designs may dent more easily.
Rot-resistant wood offers a warm appearance, yet it needs sealing and regular checks for cracks.
Recycled plastic can resist moisture, but fading and structural wear still deserve attention.
Ask how materials perform in your climate, not only in a showroom.
Check age suitability, fall height, accessible routes, drainage, and clear space around moving equipment. Inspect bolts, welds, edges, and handholds before opening the play area. Replace worn surfacing promptly. Small defects can become costly hazards.
A realistic estimate should include annual cleaning and professional inspections. Some components are easy to replace; others require major dismantling. That difference affects labor costs over ten years. I have seen attractive structures lose value because replacement parts were unclear or unavailable. That experience changed my buying checklist. I now request written maintenance schedules, expected service life, and repair pricing before approving any structure. Even careful estimates can be wrong, especially with harsh weather or unusually heavy use. Recheck the plan each year.
Choosing an outdoor play structure involves more than bright colors and exciting features. Safety evidence matters. Before purchase, ask the supplier to confirm compliance with ASTM F1487, the recognized safety standard for public playground equipment. Request documentation for the exact model, not a similar-looking product. Check its age range, fall height, guardrails, openings, platforms, and entrapment risks.
IPEMA certification adds another useful verification step. It indicates that the equipment has been evaluated against applicable safety requirements. Still, certification should not end your review. Confirm that the certificate matches the structure, accessories, and intended use. A small change in slides, climbing panels, or deck height may affect compliance. Read the installation instructions carefully.
Look closely at the site, too. A compliant structure can become unsafe when installed over poor surfacing or beside hard obstacles. Measure the required use zones around swings, slides, and climbing areas. Ask who will inspect the equipment after installation. Keep records of certificates, maintenance checks, and repairs.
Do not rely on a sales promise alone. Documents matter. I would pause before buying if answers seem vague or outdated. One detail is easy to miss: certification does not replace proper assembly, supervision, or routine inspection. I have found that a careful checklist can reveal problems that attractive photographs hide. Even experienced buyers can overlook drainage, loose hardware, or changing ground conditions. Verify everything twice.
Choosing an outdoor play structure begins with more than its footprint. Measure the six-foot use zone around every stationary component, not just the platform. This clear area helps reduce collisions when children run, fall, or leave the equipment unexpectedly. Mark the boundary with stakes and string. Measure again. Paths, benches, and fences can create hidden pinch points. A neat drawing may still hide a cramped corner.
Protective surfacing must cover the entire use zone and match the equipment’s critical fall height. Loose-fill materials need enough depth to cushion impact, and they may shift under swings or heavy traffic. Poured or tile-like surfaces also require a verified impact rating, proper installation, and regular inspection. Do not judge surfacing by appearance. A thin, compacted layer may look safe while offering little protection. Keep drainage in mind. Standing water can displace material and create slippery spots.
Swinging components need special attention. Their use zone usually extends farther in front and behind the seats, so follow installation instructions and recognized safety standards. Check bolt covers, exposed edges, and worn areas every week. In practice, I would watch children use the space before finalizing the layout. Their paths are rarely predictable. My first plan might leave too little room near a gate, a small mistake with real consequences. Revise the layout when daily movement exposes a weakness.
10 Tips for Choosing an Outdoor Play Structure
Accessible design should be checked before appearance. Confirm that routes, transfer points, ramps, and elevated play areas meet ADA requirements where applicable. Measure pathway widths and turning spaces on site. A smooth entrance is not enough. Children using mobility devices need meaningful access to play activities, not only the perimeter. Ask for clear accessibility documentation, but verify the layout yourself.
Installation quality affects safety every day. Inspect anchor points, fasteners, protective caps, drainage, and fall-absorbing surfacing. The structure should sit level, with no exposed concrete or sharp edges. Watch the crew’s process, not just the finished product. I have seen attractive installations hide poor grading and loose edging. Small defects become larger problems after rain, frost, and heavy use.
Create an inspection schedule before opening day. Staff should check loose hardware, damaged surfaces, standing water, splinters, and worn moving parts. Record findings with dates, photos, and corrective actions. Follow the manufacturer’s care instructions and applicable local rules. Clean high-touch areas regularly, while avoiding maintenance products that leave slippery residue. No checklist catches everything. Weather changes conditions quickly, and busy playgrounds reveal weaknesses that a quiet inspection may miss. Reassess the structure after storms, repairs, and unusual crowd levels.
| No. | Evaluation Area | What to Check | Useful Benchmark or Rule | Recommended Action |
|---|---|---|---|---|
| 1 | Confirm the intended age range | Match deck heights, moving equipment, climbing challenges, and guardrails to the children who will use the play area. | Use equipment designed and labeled for the appropriate age group. Separate areas for younger and older children when their equipment needs differ. | Request age-range documentation, user instructions, and a site layout before purchase or installation. |
| 2 | Evaluate an accessible route | Check the route from the site entrance to the play area, accessible components, seating, and other required amenities. | For an ADA route, a common minimum clear width is 36 inches. Ramp running slope is generally limited to 1:12, subject to applicable exceptions and local requirements. | Measure the completed route, remove obstructions, control cross slopes, and verify transitions are firm, stable, and slip resistant. |
| 3 | Check accessible play features | Look for ground-level activities, transfer access, ramps, accessible surfacing, and enough room for mobility devices. | Accessibility should connect users to meaningful play components, not only to the perimeter of the playground. Verify local accessibility requirements in addition to federal guidance. | Create an accessibility checklist that records route access, entry points, transfer spaces, reach ranges, and usable play activities. |
| 4 | Verify protective surfacing | Inspect the impact-attenuating surface beneath and around elevated equipment, including slide exits and swing areas. | Surfacing should be appropriate for the potential fall height and maintained at the depth specified by the surfacing manufacturer or applicable safety guidance. | Measure loose-fill depth with a marked probe, repair worn areas, and keep hard objects, standing water, and exposed footings out of fall zones. |
| 5 | Review installation quality | Inspect anchors, footings, hardware, deck levels, alignment, protective caps, and connections between components. | Installation should follow the approved instructions, site drawings, and applicable playground safety standards, such as ASTM F1487 where adopted or specified. | Require an installation record, torque or fastening checks where applicable, as-built documentation, and correction of punch-list items before opening. |
| 6 | Inspect for entrapment and entanglement hazards | Look for openings, protruding bolts, sharp edges, ropes, loose chains, and spaces where a head, neck, finger, clothing, or drawstring could become caught. | The CPSC Public Playground Safety Handbook and applicable standards address entrapment, entanglement, protrusion, and sharp-edge hazards. | Use the equipment manufacturer’s inspection tools or a qualified playground inspector; remove or isolate unsafe equipment immediately. |
| 7 | Establish routine inspections | Check cleanliness, vandalism, loose hardware, damaged components, drainage, surfacing displacement, and visible deterioration. | A practical program uses frequent visual checks, documented periodic inspections, and additional checks after severe weather or unusual events. | Set a daily or opening-time visual check, a documented monthly inspection, and a more detailed annual review based on site risk and local rules. |
| 8 | Plan preventive maintenance | Review corrosion, wood splitting, plastic cracking, worn bearings, swing hardware, fasteners, drainage, and surface compaction. | Maintenance intervals depend on use, climate, materials, vandalism, and manufacturer instructions; high-use sites normally need more frequent attention. | Keep a maintenance log with the date, defect, risk level, corrective action, parts used, and person responsible for closure. |
| 9 | Assess climate and site conditions | Consider heat, ultraviolet exposure, rain, snow, wind, flooding, tree roots, drainage, visibility, and proximity to traffic or water. | The site should provide adequate drainage, stable foundations, clear supervision lines, and materials suitable for local environmental conditions. | Complete a site risk assessment and include shade, drainage improvements, corrosion protection, and post-storm inspections in the operating plan. |
| 10 | Confirm compliance and documentation | Collect product instructions, site plans, inspection reports, warranties, replacement-part information, training records, and accessibility documentation. | Federal, state, and local requirements may differ. ADA obligations apply to covered facilities, while playground safety standards may be adopted or required by a jurisdiction or contract. | Have the final design and installation reviewed by the owner, authority having jurisdiction, and a qualified playground safety professional when appropriate. |
| Reference note: Dimensions and inspection intervals shown above are practical evaluation benchmarks, not a substitute for the current ADA Standards, applicable building and accessibility codes, CPSC guidance, ASTM standards, manufacturer instructions, or local regulations. | ||||